Installation
Install the Stream Overlays plugin using one of two methods: the RotorHazard web interface (recommended) or a command-line script.
Method 1: Community Plugins (Recommended)
The easiest way to install Stream Overlays is through RotorHazard's built-in plugin manager.
Prerequisites
- RotorHazard 4.0.x or newer
- Internet connection on the RotorHazard device
- Admin access to RotorHazard web interface
Installation Steps
- Open RotorHazard web interface in your browser
- Navigate to Settings → Plugins tab
- Click Browse Community Plugins (requires internet connection)
- Search for Stream Overlays in the plugin list
- Click the Install button next to the plugin
- Wait for installation to complete (progress bar will appear)
- Restart RotorHazard to activate the plugin
Installation Complete
After restarting, you should see Stream Overlays listed in the Plugins tab. Navigate to the Streams page to access overlay URLs.
Verification
To verify the plugin is working:
- Go to the Streams page in RotorHazard
- Look for Stream Overlays panels (Apex, DDS, LCDR)
- Click any overlay link to test it in your browser
Method 2: Install Script (Advanced)
For users comfortable with the command line or deploying to headless systems.
Prerequisites
- SSH/terminal access to the RotorHazard device
-
curlinstalled (usually pre-installed on Linux/macOS) - Internet connection
Installation Steps
-
Connect to your RotorHazard device via SSH or open a terminal
-
Run the installation script:
-
Choose a version:
- Select stable when prompted
- The script shows the last 5 releases from GitHub
- Choose your desired version (usually the latest)
- Press Enter to confirm
- Select development when prompted
- Installs the latest
mainbranch code - May include unreleased features but less stable
- Use for testing or contributing
-
Update existing installation (if applicable):
- If the plugin is already installed, you'll be asked to update
- Choose y (yes) to overwrite with the new version
- Choose n (no) to exit without changes
-
Restart RotorHazard:
Or manually stop/start RotorHazard if not using systemd.
What the Script Does
The install script automates:
- Fetching release data from GitHub
- Downloading the plugin files
- Extracting to RotorHazard's
plugins/directory - Cleaning up temporary files
- Verifying installation integrity
Troubleshooting Script Installation
Script fails to download:
Check internet connectivity and GitHub availability:
Permission errors:
Run the script with appropriate permissions or use sudo:
Plugin directory not found:
Ensure RotorHazard is installed in the default location. The script looks for:
/home/pi/RotorHazard/(Raspberry Pi)~/RotorHazard/(generic Linux)
Post-Installation
After installing the plugin, configure your overlays:
Updating the Plugin
Via Community Plugins
- Go to Settings → Plugins → Browse Community Plugins
- Find Stream Overlays
- If an update is available, click Update
- Restart RotorHazard
Via Install Script
Simply re-run the installation script and choose y (yes) to overwrite:
Uninstalling
Via RotorHazard Interface
- Go to Settings → Plugins
- Find Stream Overlays in the installed plugins list
- Click Uninstall
- Restart RotorHazard
Manual Removal
Delete the plugin directory:
Then restart RotorHazard.
Stream Displays (4.2.x+)
RotorHazard 4.2.x+ Feature
Stream Overlays automatically adds panels to the Streams page for easy URL access.
Finding Overlay URLs
Instead of manually constructing URLs, use the built-in Stream Displays:
- Navigate to Streams page in RotorHazard
- Scroll to the Stream Overlays section
- Click any overlay link to preview it
- Copy the URL from your browser's address bar
- Paste into OBS browser source
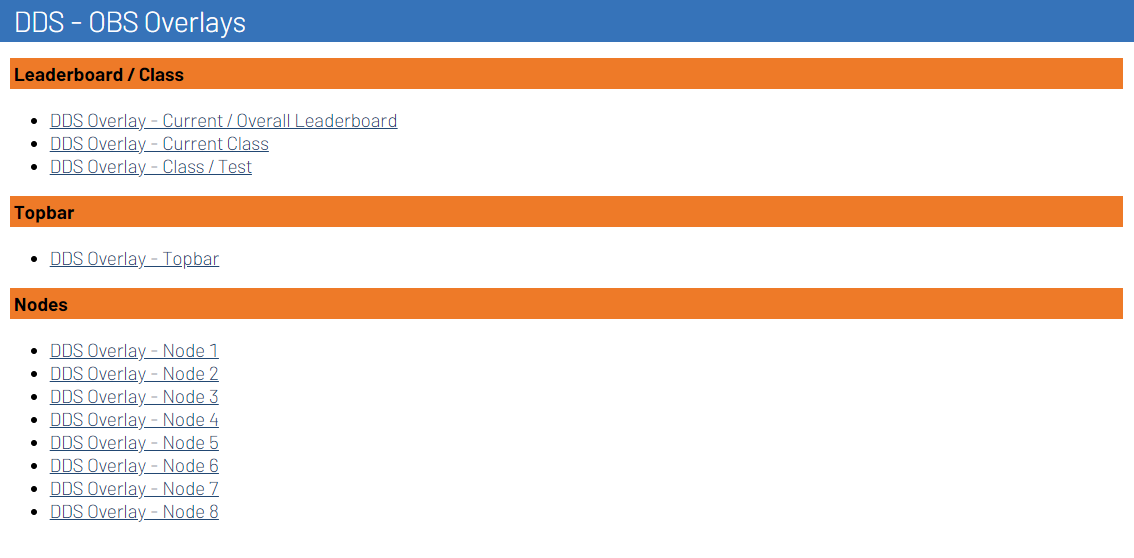
This feature simplifies setup by providing clickable links for all available overlays organized by theme.
Need Help?
- Quick Start Guide — Complete setup walkthrough
- FAQ & Troubleshooting — Common installation issues
- GitHub Discussions — Ask the community